
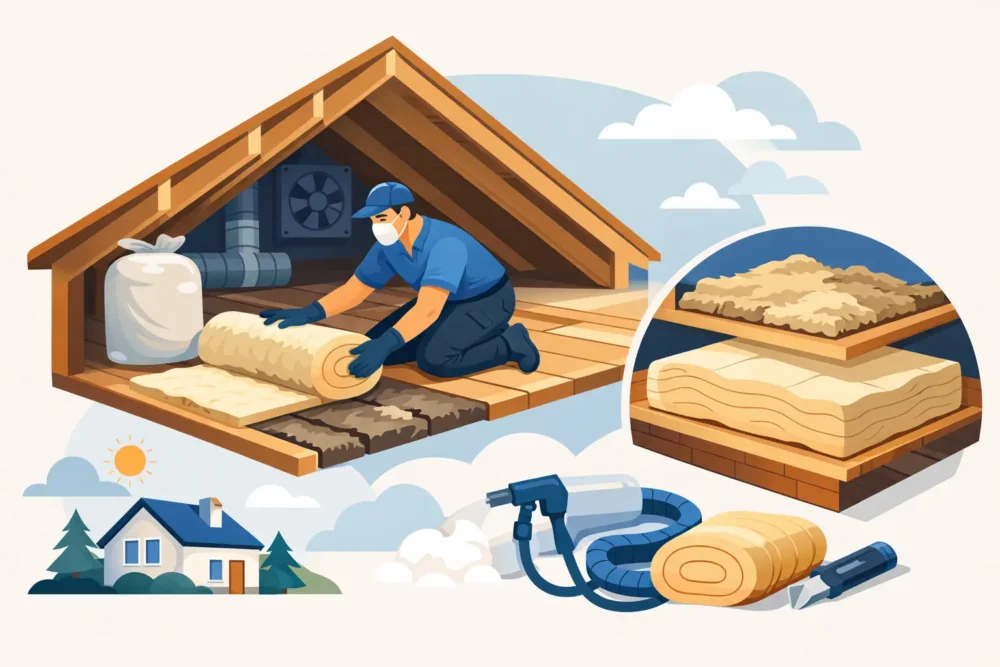
A bedroom that is too hot in July, a drafty hallway in January, and heating and cooling bills that keep climbing can all point to the same hidden problem: an attic that is no longer doing its job. This guide to attic insulation replacement explains when replacement makes sense, what must happen before new insulation goes in, and how a professional approach can improve comfort, cleanliness, and energy performance.
When Attic Insulation Should Be Replaced
Insulation does not have an expiration date, but it can lose effectiveness or become unsafe to leave in place. A quick look across the attic floor is not always enough. Insulation may appear adequate from the access opening while air leakage, moisture, pests, or compressed areas are reducing its real-world performance.
Replacement is often the right choice when insulation is wet, mold-affected, heavily contaminated by rodents, or damaged by roof leaks. Water-soaked insulation can compact and lose its ability to resist heat flow. It can also hold moisture against framing and create conditions that need to be corrected before the attic is closed back up.
Rodent activity is another clear reason to investigate. Droppings, nesting material, tunnels through loose-fill insulation, and strong odors are more than unpleasant. Contaminated insulation can affect indoor air quality, while unsealed entry points allow the problem to return. In these cases, adding a fresh layer over the old material is usually not a complete solution.
Age alone is not always a reason for removal. Some older insulation can remain in place if it is dry, clean, evenly distributed, and still providing appropriate coverage. The decision depends on its condition, the home’s insulation level, and whether the attic has other performance issues that need access for repair.
Signs Your Attic Is Underperforming
Homeowners often notice the symptoms long before they see the cause. Rooms under the attic may feel noticeably warmer or colder than the rest of the house. HVAC equipment may run longer than expected, especially during Missouri’s hot, humid summers and cold winter stretches. Floors, ceilings, and interior walls can feel uncomfortable even when the thermostat is set correctly.
Other warning signs include uneven or visibly low insulation, insulation pulled away from exterior edges, moisture stains on ceiling drywall, musty attic odors, and frequent pest activity. Ice dams can also be a concern in winter. They are not caused by insulation alone, but heat escaping into the attic can warm the roof deck and contribute to melting and refreezing at the roof edge.
A professional inspection helps separate insulation problems from ventilation, roofing, HVAC, or moisture issues. That matters because new insulation cannot compensate for an active roof leak, an open bathroom exhaust duct, or major gaps around wiring and plumbing penetrations.
The Right Order for Attic Insulation Replacement
A successful replacement is not simply a matter of removing old material and blowing in more. The best results come from treating the attic as part of the home’s entire thermal and air barrier system.
Inspect and identify the source of damage
Before removal begins, the attic should be evaluated for roof leaks, plumbing leaks, ventilation concerns, pest entry points, and signs of mold or moisture. If these conditions are not addressed first, new insulation may be exposed to the same damage.
A thorough inspection also checks the current insulation depth and distribution, the condition of attic framing, and common air-leak locations. Recessed lights, attic hatches, top plates, duct chases, plumbing stacks, and electrical penetrations can all allow conditioned air to escape into the attic.
Remove contaminated or damaged material safely
Removal is especially valuable when insulation contains rodent waste, moisture damage, or debris that makes proper air sealing difficult. Specialized vacuum equipment allows contractors to collect loose-fill insulation with less disruption than manual removal. Eligible materials may be recycled when their condition and local processing options allow.
The goal is not to remove insulation unnecessarily. It is to create a clean, accessible work area when existing material cannot safely or effectively remain. Proper containment, disposal, and cleanup are essential when contamination is present.
Air seal before installing new insulation
Air sealing is one of the most important steps in attic work, and it is often overlooked. Insulation slows heat transfer, but it does not reliably stop moving air. If warm indoor air can pass through gaps in the ceiling plane, it carries heat and moisture into the attic and reduces the benefit of the insulation above it.
Sealing accessible gaps around penetrations, chases, and attic access points helps create a more continuous boundary between the living space and attic. Fire safety requirements around chimneys, flues, and certain lighting fixtures must be respected. This is one reason professional assessment is valuable – not every gap should be sealed with the same material or method.
Correct pest, moisture, and ventilation concerns
If rodents caused the damage, exclusion work should happen before new insulation is installed. Closing exterior entry points and addressing vulnerable openings helps protect the investment. Sanitizing may also be appropriate after contaminated material is removed.
Ventilation deserves a measured approach. Attic ventilation can help manage heat and moisture when the roof assembly is designed for it, but it does not replace air sealing or insulation. Adding vents without addressing indoor air leaks can allow the underlying problem to continue. The right recommendation depends on the roof design, existing vent layout, and moisture conditions.
Install insulation to the proper depth and coverage
The final insulation type should fit the attic’s layout, budget, and performance needs. Blown-in fiberglass and cellulose are common choices for open attic floors because they fill around irregular framing and can be installed to an even depth. Batts may be appropriate in specific areas, but they must be fitted carefully without gaps, compression, or voids.
R-value measures resistance to heat flow. A higher R-value generally means greater insulating ability, but the right target depends on climate, existing conditions, available space, and local code requirements. For homes in the St. Louis area, a contractor can recommend a practical insulation level that accounts for regional weather and the structure of the home.
Replacement Versus Adding More Insulation
Adding insulation may be more cost-effective when the existing material is clean, dry, and evenly distributed. In that scenario, the work can focus on air sealing first, then bringing the insulation level up where it is thin. This option avoids the cost of full removal while still improving comfort and energy efficiency.
Replacement is usually the stronger long-term option when there is contamination, extensive settling, moisture damage, pest nesting, or a need to access the ceiling plane for significant air sealing. It can also make sense after major renovations, repeated roof leaks, or years of neglected attic conditions.
The trade-off is upfront cost. Removal and remediation require more labor than simply adding insulation. However, covering damaged material can leave odors, allergens, air leaks, and pest evidence behind. The lower initial price is not always the lower lifetime cost.
Questions to Ask Before Hiring an Insulation Contractor
A trustworthy contractor should explain what they found, not just recommend a product. Ask whether the quote includes inspection, insulation removal, disposal, air sealing, sanitation, rodent proofing, ventilation work, and final insulation installation. These are distinct services, and homeowners deserve clarity about what is included.
Also ask how insulation depth will be measured, what R-value is being recommended, and how the crew will protect living areas during removal. Licensed and insured technicians, written estimates, and a satisfaction guarantee provide additional peace of mind. Thermal imaging can also be useful for identifying temperature differences and confirming where heat loss may be occurring, although it is one diagnostic tool rather than a substitute for a full inspection.
Better Home Insulation approaches attic projects as more than an insulation sale. A free inspection and estimate can help identify whether your home needs removal, air sealing, pest remediation, new insulation, or a combination of services designed around the actual cause of the problem.
Protect the Results After Installation
Once the attic is properly sealed and insulated, protect the improvement by keeping bathroom and kitchen exhaust fans vented outdoors, monitoring the roof for leaks, and addressing pest activity promptly. Avoid storing heavy items directly on loose-fill insulation, which can compress it and reduce coverage.
If a room remains uncomfortable after the attic work is complete, do not assume the insulation failed. Walls, ducts, windows, crawl spaces, and HVAC performance may also affect comfort. A home performs as a system, and the most lasting improvements come from following the evidence instead of guessing.
A cleaner, properly insulated attic can make the rooms below it feel more consistent every day. The best next step is a clear inspection that gives you answers before another season of high bills and uneven temperatures passes by.